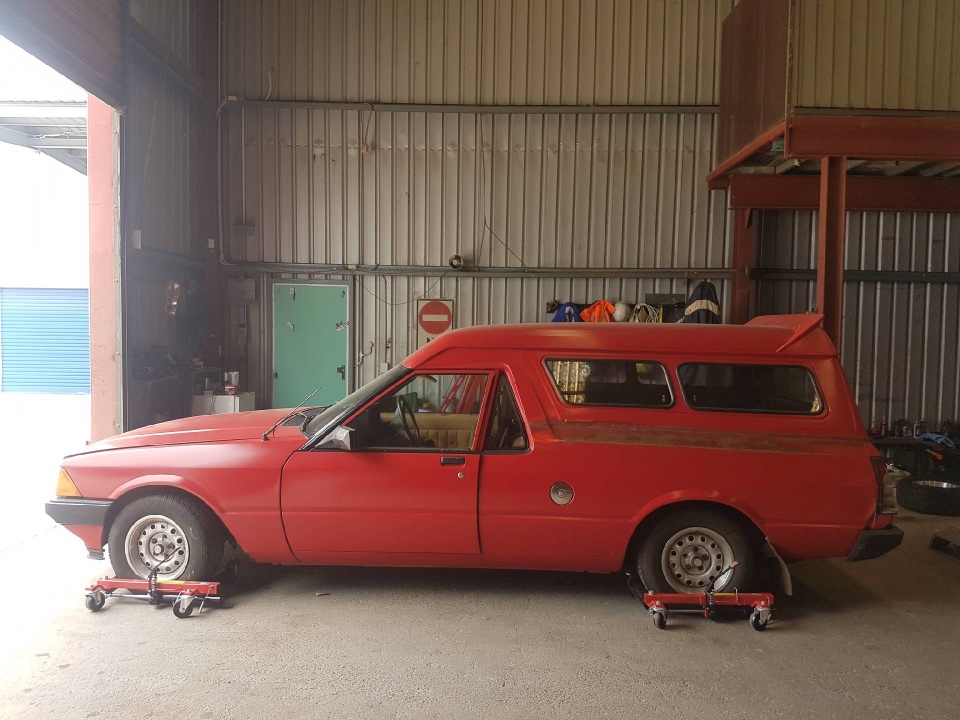
Is there a difference in length for XD or XE steering columns? Reason I ask is because the steering wheel in my XD is very close to the driver, have to squeeze past it to get in/out (I don't think I'm THAT fat)? I'm sure my old XE wasn't like it.
Otherwise I might consider an aftermarket steering wheel as the XD GL type one does come forward a fair bit too.
Nostalgia, some level of originality, engineering/licensing considerations, emissions considerations and the logistics of keeping a non EFI car not EFI (additional wiring, fuel supply etc).
You could say "why would anyone think of restoring a ZK Fairlane AT ALL when a nice BF Fairlane can be bought for less than $10,000."
No one ever said car enthusiasts were motivated by fuel efficiency or whether their project is economically a good idea. We do what we want...?
The comment about expense. well around $500. Expensive, yes if you compare to garden variety piece of which requires modification to your vehicle I do not consider that expensive for the features you get. I assure you that I watch what I spend and only spend on things that I believe will be of sufficient benefit to make the purchase worthwhile.
Lindsay
MacMan
my experience with fitting is a positive one and I Managed to retain the ESP Premium sound system facia and components (including the graphic equaliser). the pots fur tuning and adjustments can be moved to accomodate mating up to the cars particular layout. the unit is really compact and light and if you you feel the need you can buy sticks facia with ford logo. I ditched this because it caused difficulty reading the screen telling me what I am scrolling to or what radio station that I am on. I was able also to get XD/E type knobs but because of my set up with retaining the premium sound look of the dash I had to modify knobs slightly but they do work ok and In my opinion look a bit oversized compared to the facia of the radio unit. blue tooth and phone connectivity is good as well. My son fitted the same unit to his XD Fairmont Ghia.
Lindsay
Nostalgia, some level of originality, engineering/licensing considerations, emissions considerations and the logistics of keeping a non EFI car not EFI (additional wiring, fuel supply etc).
You could say "why would anyone think of restoring a ZK Fairlane AT ALL when a nice BF Fairlane can be bought for less than $10,000."
No one ever said car enthusiasts were motivated by fuel efficiency or whether their project is economically a good idea. We do what we want...?
As said, for ESP only, without them the mechanism rubs on the bottom of the seat, I took mine out and made half height ones (25 mm) so I don’t rub on the steering wheel getting in and out, and angled the ends at 45deg so they go a bit further forward so my short as missus can get the seat forward enough.
Hi Fitted a retro sound unit to My ESP as I was fed up with trying to keep the original units running. retro sound was easy as and gives me the option of bluetooth, Streaming from phone and easy to install.
pretty Awesome. My Son also fitted one to his XD Fairmont Ghia
The only difference I'd say to that is instead of etch, use ppg epoxy (or similar) after you sand the bay. It will permanently seal the old paint and bare metal at the same time and give you a consistent base layer to work up from. The stuff I use was called ppg 408 grey-green but it's had a name change that I can't remember the new code.
TBH i wouldnt strip it completely unless it is really bad. you can just clean up the rust affected areas and key all the other paint if it is sound. Really depends what you want to acheive. certainly stripping to bare metal etch prime, prime, body work, base and clear is the way to go for a restoration but if you are just doing a tidy up theres no need to bare metal the bay.
Ive done both ways and each looks equally as good, one just take 100s of hours more than the other.
good to see you guys learnt enough at school to understand all that to get the air con working way over my head and last time i had the au regassed costa lot worked for a month took it back to my friend who is another like "jacks mate" so your not alone outback lol think the c.....t left town years ago but my cheap solution was engel 40 an windows down for cool down on long drives works a treat still works today but have to admit the h2o liquid is a lot clearer now lol hope it all goes well for ya Grimmy
cheers demmo
You need to undo the 2 nuts and bolts that go through the flange and rag joint, gently tap or pry the steering shaft up (it telescopes into the upper section), then undo the nut on the steering box input shaft to remove that flange adaptor and rag joint. If replacing the joint, the new one will come riveted to the input flange through the drive pins, or a replacement urethane rag joint will come with its own bolts (replacing the riveted pins) in which case you need to push out the pins.
All this is of course easier to do with the whole box out
Edit: I just realised that you might be taking the box out. So just those 2 flange bolts on the steering shaft and it will separate.
For an EFI - all of them.
and
For a Carby running the stock 34adm - also all of them.
Normally, they all work together as one happy family.
I'm not familiar with the EFI hoses,
but the carby ones relate to timing advance, throttle nudger on over-run,
idle up/timing advance when Aircon is running,
and other similar functions to prevent stalling.
The Italian made Weber 34adm Carburetor, was factory fitted to XE/XF Falcon 6cyl, Ford F100-350's and Ford Bronco 6cyl.
It existed as factory fitment, from mid 1982, up till March 1993 - when the XF Falcon commercial range ended, and the XG Falcon was launched.
The stock 34adm carby, has a flow rate of 230cfm. (see flow test pic, further down)
For an easy upgrade, a 38/38 Weber carburetor has a 390cfm flow rate,
and bolts directly to the stock intake manifold.
The purpose of this thread, is to have Technical and Parts info for the Weber 34adm Carburetor, all in one location.
I will edit and add to this first post, as I find further info.
If anyone has any additional info on these carby's, they're most welcome to add it into the thread.
1. Throttle nudger: On the XE/XF Falcons this is used to hold the throttle open slightly during an overrun condition by applying vacuum at the hose fitting. The screw in the top sets how much the throttle is held open.
2. Accelerator pump accumulator: Receives the fuel charge from the accelerator pump and controls the discharge rate of the fuel into the air stream.
3. Fuel inlet fitting.
4. Fuel filter plug. There is a small plastic filter under this plug.
5. Fuel return. On some models this is used to return fuel to the fuel tank when item 6 (below) is fitted.
6. Fuel return solenoid fitting. On some models there is a solenoid screwed into this fitting that energises when the throttle is closed, allowing fuel to return to the tank when at idle.
7. Idle solenoid. Allows fuel to flow in the idle circuit when this solenoid is energised. +12 Volts must be applied to this solenoid when the ignition is switched on.
8. Power bypass circuit actuator diaphragm. Allows fuel to flow in the power bypass circuit when low manifold vacuum is sensed.
9. Accelerator pump lever.
10. Electric automatic choke mechanism. Under the green plastic cover there is a heater element and a bi-metallic spring. +12 Volts is applied to the threaded stud in the centre when the ignition is on. The heater element heats up and in time, causes the bi-metallic spring to rotate the choke shaft, causing the choke to open. Loosening the three screws allows the cover to rotate, to adjust the choke to the correct fully open position after warm-up.
11. Fast idle screw. Adjusts the fast idle speed. Operates whenever the choke is partially closed. There are several steps of fast idle due to the operation of a stepped cam inside the choke mechanism. Adjustment should be made for fast idle on the first step after a cold start. Do not use this screw to adjust the normal idle speed.
12. Choke pull-off diaphragm. Cracks the choke open slightly as soon as the engine starts. Under the small brass plug at the centre there is a grub screw that adjusts how much the choke is cracked open.
13. Accelerator pump. Pumps fuel into the air stream, via the accelerator pump accumulator, during hard acceleration.
14. Idle speed screw. Adjusts the idle speed. To be adjusted only after the engine has reached operating temperature, and the choke is fully open.
15. Vacuum advance connection. Connects to the distributor vacuum advance diaphragm.
16. Idle mixture screw. Adjusts the idle fuel/air mixture.
Stock jetting for 3.3l and 4.1l Crossflow Weber 34adm carburettor-
First stage Idle: 60
Second stage Idle: 70
Primary Fuel: 135
Secondary Fuel: 210
Primary Air: 160
Secondary Air: 160
The following jetting, apparently gives excellent throttle response, very smooth idling and excellent pickup on secondaries -
(stock 3.3l Crossflow Motor)
Weber 34ADM carburettors, have a 2 stage low speed jet solenoid.
This was an emissions control system, which allowed the engine to run with one jet size when cold (70)
and when the engine warmed up it switched to a smaller jet to reduce emissions (55).
As the idle jet vacuum solenoid ages, the little diaphragm inside fails allowing - fuel to flow from the primary low speed circuit through the failed solenoid
and into the line that supplies vacuum to the system.
This causes the engine to run super rich.
Products which can solve the problem can be found at the below links,
comprising of a larger jet holder, which deletes the solenoid and the appropriate jets to go with it.
You may need to mess around with the jets to find the right one for your engine
Here is a picture of the system on the standard carb
and of another of the carb, with the idle jet solenoid system deleted.
You will note all the vacuum ports except the vacuum advance are capped off, deleting the emissions control systems
(EGR etc).
This pic shows the throttle nudger, which is supposed to hold the throttle slightly open momentarily if the throttle is snapped shut suddenly to smooth things out.
On some models it may also have been supplied vacuum as an idle up system for air con etc.
The diaphragm can fail and cause a vacuum leak and most of the carb rebuild kits don't include this particular diaphragm.
The vacuum port for the power valve is in an odd place on these carbs and some off the shelf adaptor plates will blank it off causing the engine to run on the power valve all the time and run very rich.
The port is actually under the base plate and is not open to either of the carb barrels.
If this port is omitted, vacuum will not be supplied to the power valve or the accelerator pump boost diaphragm and the carb simply wont work properly.
If you look at the underside of the carb you will find the port (it might even be blocked with crud).
The port is located between the primary and secondary bores and continues up through base and into a tube in the carb body.
The tube also acts as a locating dowel and can sometimes become damaged and obstructed if the carb hasn't been assembled correctly at some stage in the past.
Further useful info can be found here -
http://www.mbs.id.au/tuning/Carburettors/Weber/34ADM.htm
There are five springs in total fitted in this carb. By process of elimination you can work out several of them but some are interchangable and if fitted incorrectly will cause mixture problems. So keep the springs with their correct counterpart.
Shown are the vacuum passages to the power valve diaphragm and the boost accelerator pump. When vacuum drops to a pre-determined level the power valve diaphragm is pushed into the power jet which opens the ball to allow more fuel into the main circuit. Also the loss of vacuum applies an extra amount of fuel to the accelerator pump circuit over and above what the accelerator pump diaphragm will deliver. This will usually occur when the second barrel is opened suddenly. The different spring length & tension will operate these devices at differing vacuum settings.
The vacuum to the power valve & accelerator pump boost diaphragms is supplied through this tube. The vacuum port continues down through to the base of the carb between the primary and secondary bores. The tube also acts as a location dowel. It is long enough to pass through the thick gasket and into the base. Now what can happen is that if you don't line up the dowel perfectly to the base and you attempt to tighten the base screws then the tube can be pushed further into its bore in the body of the carb. The end result is a blocked vacuum passage. This will result in a rich cruise mixer and a hesitation when the second barrel opens suddenly. To check that the passage is unobstructed, place you mouth on the tube and suck or attach a tight hose and suck on it. It should feel easy to suck through. If not then this is what needs to be done.
Remove the tube and the easiest way to do this is to stick a drill into the tube, then use a small pair of vice grips to grip it and twist it out. Cut a slot into the tube and then refit it back into the hole. Make sure the slot lines up with the vacuum passage and the tube protrudes through the thick gasket so it can line up with the base. The slot does not have to be as long as in the photo. If the tube is fitted at the correct depth, this mod would be unnecessary.
Yep, been there recently also. Replacement water pump and the thread for the four small pulley bolts were different. Who'd have known, pretty frustrating at the time 😵


 macman got a reaction from CHESTNUTXE in XD XE steering column length?
 macman reacted to cisco in Post your Interior Pics!
 macman got a reaction from Outback Jack in why rebuild a crossflow?
 macman got a reaction from Luke13 in GMB water pump different thread