


Oscar of Markoz
-
Content Count
182 -
Joined
-
Last visited
Reputation Activity
-

 Oscar of Markoz got a reaction from deankxf in TF Cortina Project
"On todays episode of Australian Cortina ....."
Finally got around to welding up the intake runners and filing them back. They still need more sanding and alittle shaping etc, but are pretty good. Getting the hang of welding cast alloy is alittle tricky but it all came good in the end. It was a matter on knowing my machine as much as knowing the technique.
So I filed and sanded the welds back to make the runners resemble something from factory. I'll smooth them and the plenum and injector housing so they'll all match and look nice. Alot of crap comes out of the cast when you weld it, so it tend so get pinholes and stuff. So I would weld, file and then reweld to get it as good as possible.
You can see in the last photo it comes quite close to the battery cover, so I'll make a recess area in the cover so it clears alittle better.
Now I just need to deck some of the faces, mainly runners to plenum and them the other end and also the injector housing, just to make sure all the surfaces are perfect and then pressure test it all. Once thats done, I'll start on the recess of the battery cover and then tig welding the turbo manifold.
-
 Oscar of Markoz got a reaction from winton in TF Cortina Project
"On todays episode of Australian Cortina ......"
Did some more work on the intake manifold. Firstly I wanted to remove the brackets and bungs that were cut or molded into it. I'll put some bungs for vacuum lines etc later into the back of it, so its much neater for plumbing. So what I did, I cut the peices off with the grinder and then shaped and used those peices as plugs to plug up the holes. It worked a treat. Yes it was tedious work, but its the same material so I though it would work best. I just welded the top of it close to the surface and then filed them smooth.
I then decked the ends of the runners that meet up to the injector manifold. I got some 80g emerycloth and nail it to the bench, then spray it with WD40 and then pushed the manifold back and forth along it. 4 hours later, I finally had a decked set of runners. Dead flat now and butt up perfectly. I decked the injector manifold while I was at it.
Did some porting of the runners as due to being cut into so many peices, they had overlaps and all sorts of stuff. Using a combination of the allow burrs and the metal burrs, along with an extension for the die grinder, I finally got some decent results, I think! 6 hours in this one. OOFT!
And this is what it looks like now. I did some work on the fuel rail also, but I'll go into more detail later after I get the bungs for the ends put on etc.
Next I'm going to pressure test the manifold, just in case, and then see if I can get it flow tested at RPM Motorsport with Steve. I might need to make the throttle body elbow first, but I'll see what he says. Also finish off the fuel rail.
-
Oscar of Markoz got a reaction from winton in TF Cortina Project
"On todays episode of Australian Cortina ......"
Did some more work on the intake manifold. Firstly I wanted to remove the brackets and bungs that were cut or molded into it. I'll put some bungs for vacuum lines etc later into the back of it, so its much neater for plumbing. So what I did, I cut the peices off with the grinder and then shaped and used those peices as plugs to plug up the holes. It worked a treat. Yes it was tedious work, but its the same material so I though it would work best. I just welded the top of it close to the surface and then filed them smooth.
I then decked the ends of the runners that meet up to the injector manifold. I got some 80g emerycloth and nail it to the bench, then spray it with WD40 and then pushed the manifold back and forth along it. 4 hours later, I finally had a decked set of runners. Dead flat now and butt up perfectly. I decked the injector manifold while I was at it.
Did some porting of the runners as due to being cut into so many peices, they had overlaps and all sorts of stuff. Using a combination of the allow burrs and the metal burrs, along with an extension for the die grinder, I finally got some decent results, I think! 6 hours in this one. OOFT!
And this is what it looks like now. I did some work on the fuel rail also, but I'll go into more detail later after I get the bungs for the ends put on etc.
Next I'm going to pressure test the manifold, just in case, and then see if I can get it flow tested at RPM Motorsport with Steve. I might need to make the throttle body elbow first, but I'll see what he says. Also finish off the fuel rail.
-
 Oscar of Markoz got a reaction from Mr Polson in Watch up out for these guys
Hey Guys, just a warning. Recently bought a ebay radiator through a seller called Winner Racing (yes from China). Item arrived and it doesn't fit in the car at all. They gave me terrible after sales support to the point that wanted me to modify the radiator to make it fit. Cracked me up. So please be aware of these guys. Since its $110 to send the stupid thing back and Paypal only cover $45 of it, it looks like I'll have to end up keeping it and getting it modified to fit. Not happy Jan!
-
Oscar of Markoz got a reaction from Mr Polson in Watch up out for these guys
Hey Guys, just a warning. Recently bought a ebay radiator through a seller called Winner Racing (yes from China). Item arrived and it doesn't fit in the car at all. They gave me terrible after sales support to the point that wanted me to modify the radiator to make it fit. Cracked me up. So please be aware of these guys. Since its $110 to send the stupid thing back and Paypal only cover $45 of it, it looks like I'll have to end up keeping it and getting it modified to fit. Not happy Jan!
-
Oscar of Markoz got a reaction from deankxf in TF Cortina Project
"On todays episode of Australian Cortina ....."
Finally got around to welding up the intake runners and filing them back. They still need more sanding and alittle shaping etc, but are pretty good. Getting the hang of welding cast alloy is alittle tricky but it all came good in the end. It was a matter on knowing my machine as much as knowing the technique.
So I filed and sanded the welds back to make the runners resemble something from factory. I'll smooth them and the plenum and injector housing so they'll all match and look nice. Alot of crap comes out of the cast when you weld it, so it tend so get pinholes and stuff. So I would weld, file and then reweld to get it as good as possible.
You can see in the last photo it comes quite close to the battery cover, so I'll make a recess area in the cover so it clears alittle better.
Now I just need to deck some of the faces, mainly runners to plenum and them the other end and also the injector housing, just to make sure all the surfaces are perfect and then pressure test it all. Once thats done, I'll start on the recess of the battery cover and then tig welding the turbo manifold.
-
Oscar of Markoz reacted to deankxf in TF Cortina Project
i love how this project keeps moving along, and doing it all at home too
-
Oscar of Markoz reacted to SirkWhyXF in TF Cortina Project
Sweet.
Had a quick look through, and liking what I see. Have to check this out in more detail later.
Some great work so far mate.
-
-
Oscar of Markoz got a reaction from deankxf in TF Cortina Project
"On todays episode of Australian Cortina ....."
Finally got around to welding up the intake runners and filing them back. They still need more sanding and alittle shaping etc, but are pretty good. Getting the hang of welding cast alloy is alittle tricky but it all came good in the end. It was a matter on knowing my machine as much as knowing the technique.
So I filed and sanded the welds back to make the runners resemble something from factory. I'll smooth them and the plenum and injector housing so they'll all match and look nice. Alot of crap comes out of the cast when you weld it, so it tend so get pinholes and stuff. So I would weld, file and then reweld to get it as good as possible.
You can see in the last photo it comes quite close to the battery cover, so I'll make a recess area in the cover so it clears alittle better.
Now I just need to deck some of the faces, mainly runners to plenum and them the other end and also the injector housing, just to make sure all the surfaces are perfect and then pressure test it all. Once thats done, I'll start on the recess of the battery cover and then tig welding the turbo manifold.
-
 Oscar of Markoz got a reaction from SirkWhyXF in TF Cortina Project
History:
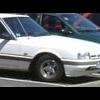
After owning 2 other TF cortinas, which were both riddled with rust, I found another 1 owner example. After some small talk with the owner I managed to get it cheap. The log books and Ford manuals were chucked in with it. Its a TF S Pac Cortina, auto with the air-con.
The interior was in great condition, air-con didn't work and had only 123,000kms. The suspension was worn, but otherwise this thing drove really nice.
And the major bonus, no rust. At all (So I thought). After owning 2 I knew where to look. It was perfect.
I replaced the steering and suspension with my old items I had at home which were re-coed and modified (H/D lowered springs, whiteline swaybars etc). I put on a set of extractors and a Weber carb off a XE falcon. Replaced the diff with my diff which is an LSD with 3.45:1 ratio.
The car ran a 15.96, still with the BW auto.
After this, I had a really, really bad experience with a backyard panel beater/spray painter, which I don't want to mention as it just upsets me too much, SO DON'T ASK!
After installing the said bits above (main difference is its lowered)
That was 7 years ago. And here started my journey into building this car, myself.
I have bought a few bits which I'll keep to myself until I install them as its not worth mentioning. But the basic idea is to go turbo 6 and have a really nice streeter. But I do want things to be done to the best of my ability. So what I can do, I will.
I made up a set of mini-tubs
Made a Rotisserie from 2 engine stands
-
Oscar of Markoz reacted to Mixalis in TF Cortina Project
Awesome to see the thread here Oscar long time follower on FAF
Sent from my iPhone using Tapatalk
-
Oscar of Markoz reacted to dougie77 in TF Cortina Project
Looking good as always Oscar good to see you moved your thread over <br /><br /><br />Cortina for life
-
-
Oscar of Markoz reacted to TUFE in TF Cortina Project
Thats where I remember this from, FAF! Cool build, what diff setup was going in this? I may have missed it when I read though
-
Oscar of Markoz reacted to Kiwi-E in TF Cortina Project
Love the fab work mate. You always see new tricks on how someone has made something reading builds like this. I'll be very keen to see the progress in this one.
-
 Oscar of Markoz got a reaction from bear351c in TF Cortina Project
"On todays episode on Australian Cortina ...."
My TIG's HF start shit itself so I took it for repairs under warranty. They used up replaceing the whole machine, looks to be a slightly upgraded one too. Anyway I ran out of gas and so went out and bought my own bottle as I was sick of paying the BOC rental fees. But I bought it for the MIG as I thought I might as well start the firewall cover plate.
So I had to make up a few bucks from wood and then basically clamped and hammered and dollyed till I had the swage looking as close to the original firewall plate as possible. But this time of course it covers the whole firewall not just 1 3rd of it. I made it drop down in the centre and sits in across the top lip, a depth of 15mm all round. So I had to make up a bracket with a rivnut in it and spot welded it on to the firewall. This holds the plate out at the correct depth all the way around and lets me screw a bolt in at that spot also. Curving the panel slightly all the way around was the hardest part as after its got the swage in it, its quite strong, but slowly slowly I manage to curve it correctly.
Now I'm going to buy my own ARGON bottle to have also and I'll get back into the intake manifold.
-
Oscar of Markoz got a reaction from bear351c in TF Cortina Project
"On todays episode on Australian Cortina ...."
My TIG's HF start shit itself so I took it for repairs under warranty. They used up replaceing the whole machine, looks to be a slightly upgraded one too. Anyway I ran out of gas and so went out and bought my own bottle as I was sick of paying the BOC rental fees. But I bought it for the MIG as I thought I might as well start the firewall cover plate.
So I had to make up a few bucks from wood and then basically clamped and hammered and dollyed till I had the swage looking as close to the original firewall plate as possible. But this time of course it covers the whole firewall not just 1 3rd of it. I made it drop down in the centre and sits in across the top lip, a depth of 15mm all round. So I had to make up a bracket with a rivnut in it and spot welded it on to the firewall. This holds the plate out at the correct depth all the way around and lets me screw a bolt in at that spot also. Curving the panel slightly all the way around was the hardest part as after its got the swage in it, its quite strong, but slowly slowly I manage to curve it correctly.
Now I'm going to buy my own ARGON bottle to have also and I'll get back into the intake manifold.