


adrianphu123
-
Content Count
318 -
Joined
-
Last visited
Posts posted by adrianphu123
-
-
it seems i have jinxed myself and the temp senders now reading slightly high even for a hot day, when my autometer gauge reads lower.
So either i have an actual problem or its just the sender
-
yeah i got an autometer one
-
yep, had that trouble but not as bad as yours, always stayed between 1 and 4 bars. The instantaneous change between 1 and 4 bars suggested that there was a problem since its pretty much impossible to change that quickly. got a new sender and the problem continued for a few weeks until it finally settled down.
-
Hey guys
Seems like the rear windscreen seal is leaking, has anyone used the new rarespares seal? How does it fit and did you use any sealant with it? I used Motorspray branded sealant with the old seal and it doesnt seem to be much good.
thanks
adrian
-
I'd recommend a 2.5 inch with an aerochamber muffler and a resonator in the rear section, i dont think you'd lose anything going from a 2.25 to a 2.5
-
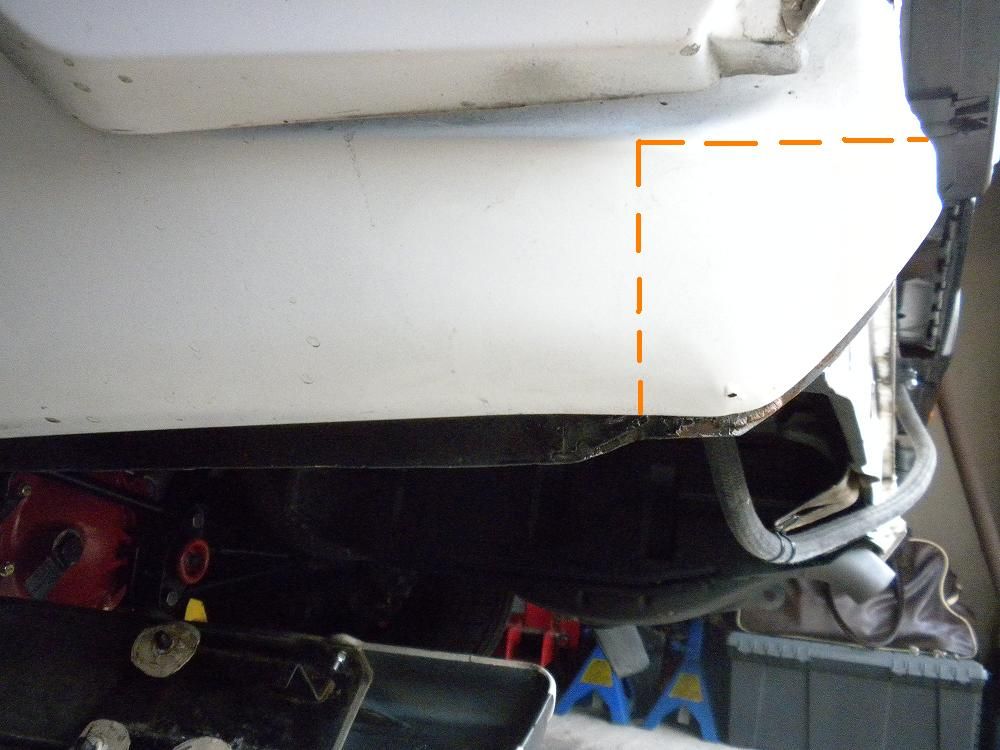
Hey guys, ive been repairing the front of the sill panel under the guard and the rear quarter. i've seam sealed the joints in the sill front with Wurth brand spray sealer in a caulk tube, I was wondering how i would go painting it, if the sealer has already dried for about a week. Im also wondering how it would take acrylic paints?
Im aware it says to paint wet on wet within about 20 minutes, would this be a better idea for the rear quarter? Im planning to paint it with Transtar rubberised undercoating for the sill front and acrylic for the rear quarter.
thanks
adrian
-
same here, i always thought it was carby = steel fan while EFI = plastic
-
I got a davies craig one from rarespares. Part number 2712, cost me 99 bux
-
Had another look at the front wheel arch on the inside, its really not even close to being bad enough to warrant cutting it there.
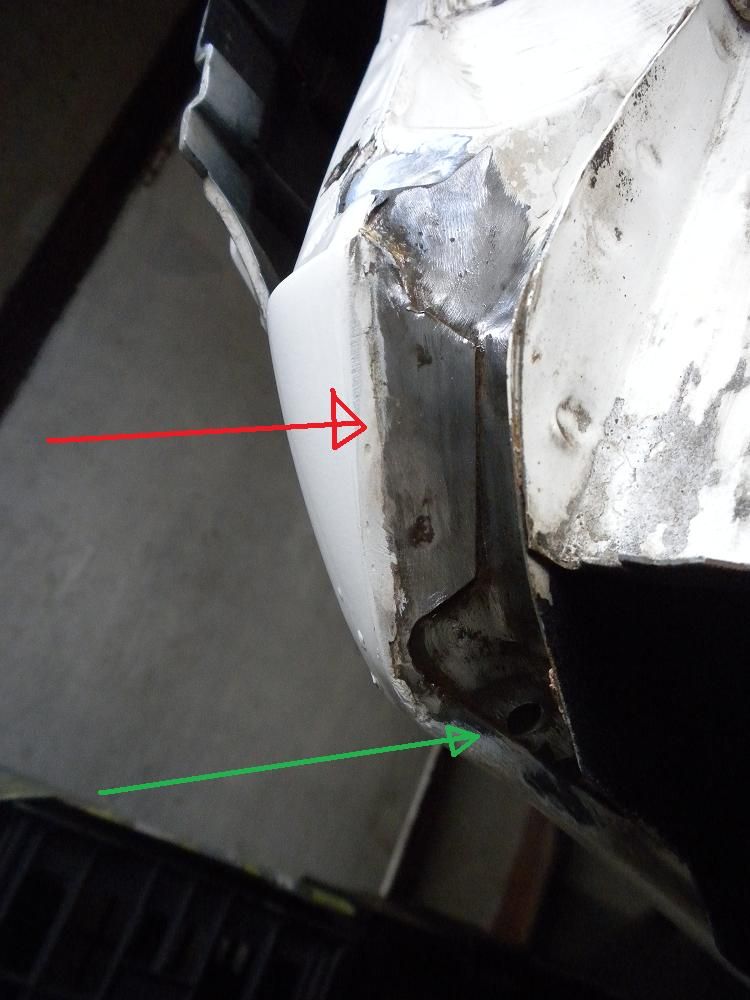
Where the outer quarter wraps around (1st and 2nd pic, red arrow) i can barely reach the two spotwelds, can i drill them out at an angle? I've managed to split the 3 panels to clean that up, i'll drill and plug weld it back and then cut the outer quarter where i originally proposed, then cut the inner to repair the seam between the inner and outer.
-
your balls are safe! spot on mate
i think thats a much better option actually, most of the inner quarter is still good, rust only where the seam is so i can patch repair any pinholes.
So buy a new outer, patch repair the inner and rust treat the triple panel seam
-
With the inner quarter, it has already seperated from the outer quarter more or less, so should i cut it out so i can gain access to the seam to clean it out? that way i can also replace the inner quarter which has pinholes in it anyway.
By cutting the outer quarter as shown, it should allow me to clean out underneath the oval and the arrow next to it as well as remove the tab to clean under that,
How will i tackle the rust between the 3 panels at the back?
I just paid for gas rental so im damn using it!
-
Hey guys
Just dug into a quarter i had done a few years ago by a dodgy mob, starting to rust in the areas shown and wanted to know what was the best way to approach it.
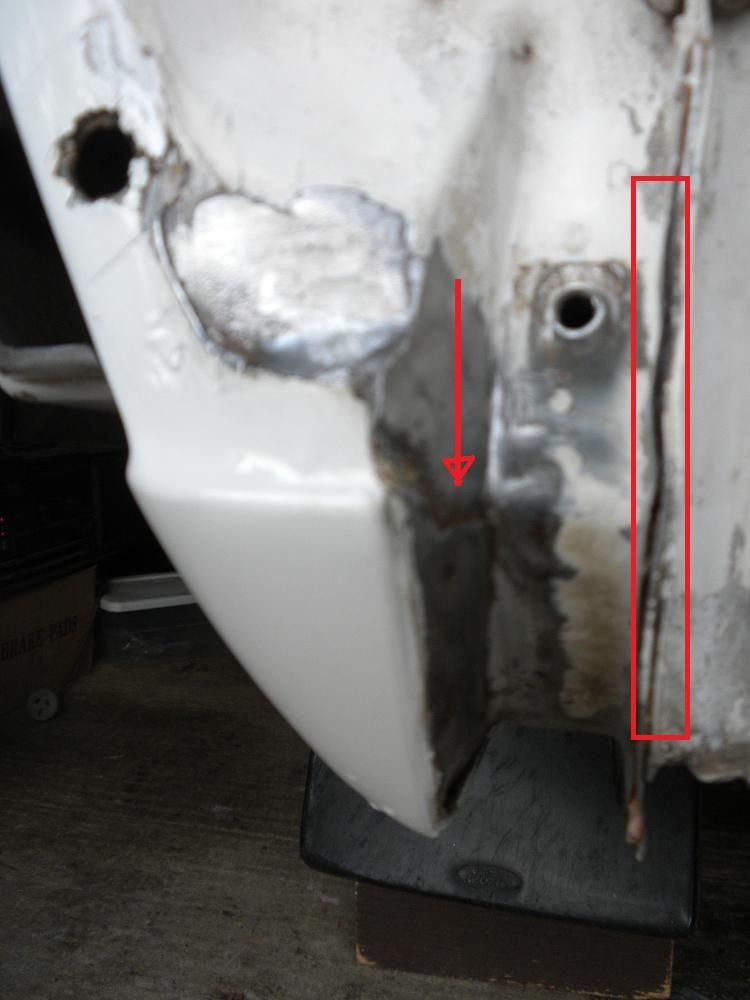
Rust is starting in the rectangle which is 3 panels(outer quarter, inner quarter, beaver panel) and underneath the bit shown in the arrow.
Under the red arrow, there should be a fold over where the green arrow is.
Rust bubble at the red arrow. Note there should be a tab over the two holes but they cut it off and it has allowed water to enter the quarter.
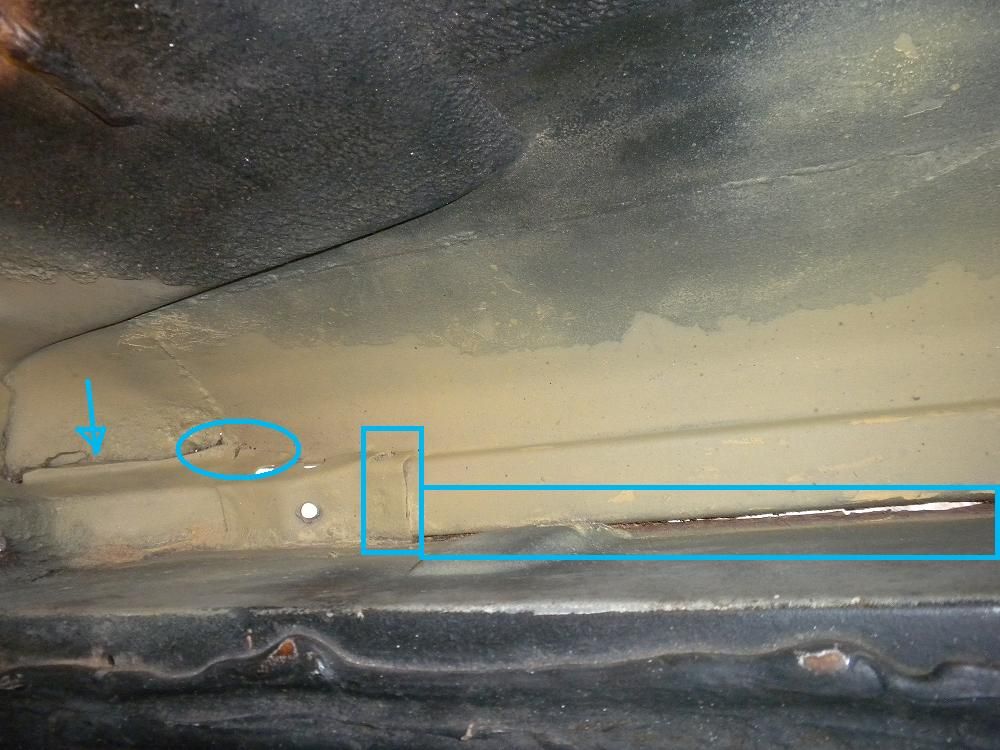
The inside of the quarter looks like this. I wirewheeled it the best i could and etched it for the time being.
The seam between the inner quarter and outer quarter needs to be cleaned out because its full of rust, the inner quarter needs to be replaced as its got pinholes of rust.
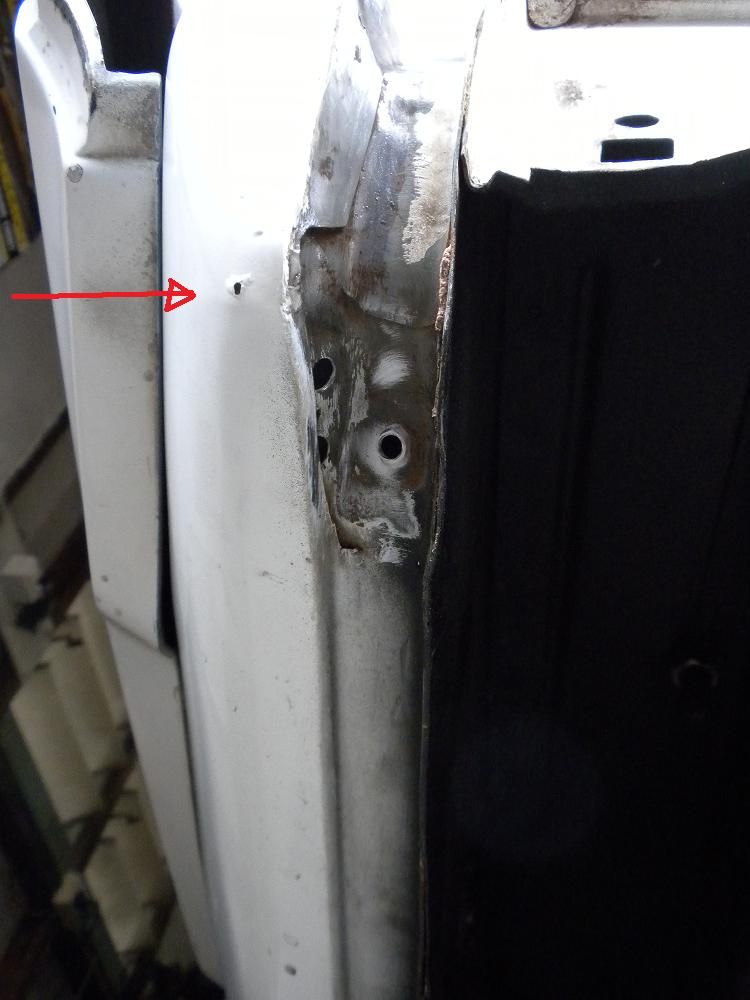
the small vertical rectangle has rust underneath, the oval has rust which has gone all the way through the quarter as shown on the outside. The arrow has rust underneath, between that piece and the outer quarter.
Whats the best way to deal with all these issues properly?
On the outer quarter, im thinking of making this cut
but when it comes to the inner quarter, im a bit lost on what will make it easier.
Any ideas would be appreciated? Im thinking of trying the metalwork myself, if worst comes to worst, i'll pay someone the money to fix it
thanks
adrian
-
I would recommend against buying a bend and cutting to make 2 bends. You never the the correct angles and even though mandrel bending maintains the diameter, it deforms the pipe slightly and fitment will become an issue
When fitting the over the diff section of the exhaust, support the car on the rails and let the axle hang to give you more room.Especially good if you've painted diff or exhaust. Useful for fitting the rear swaybar too.
When i did my exhaust, i made mounts to suit the stock hangers, flanged it after the headers, before and after the muffler. I wish i had raised the muffler a bit more, as its barely hitting the swaybar but i think i can just get away with it. I would recommend using 3 bolt flanges as they are roughly the same price as 2 bolt ones.
Good write up mate, lots of good ideas there
gerg reacted to this -
or a stainless heat shield
-
did you have room to move up before? thats why i asked, if you dont raise/move the muffler, its just going to happen again.
Liverpool exhaust in liverpool and best mufflers in carlton have always given me good advice
If you have the extra coin, get a welder and do it yourself, its worth the experience.
-
loosened the raduis rod off and went straight in first go.
-
Are you going to be rebuilding the whole system? do you have room to raise the muffler? I have a 2.5 inch system with an aerochamber in the middle and hurricane headers resonator sitting in the area between the spare wheel tub and the fuel tank.
-
both wheels are off the ground, with stands on the rails so both sides are at full droop.
-
nope, still havent got it in. The radius rod wasnt loosened when i did the arm so i might try doing that as a last resort. I'll need a wheel alignment anyway. I've got superpro castor bushes so pushing it down to meet the arm is a major effort.
Tried jacking up the lower arm to meet the radius rod, loosening the ball joint etcetc but still wouldnt go in.
Any other ideas?
-
Hey guys just replaced the lower control arm on the XF, bolted the ball joint end and the chassis end, now the radius rod wont go back in. It'll go in until about the thread and then hang up. Any tips or tricks? I've felt the holes and they seem fine, nothing that the studs'll hang up on.
thanks
adrian
-
I used whatever rarespares stocks but i didnt put underlay at the time because i didnt have any at the time, but will when the tailshaft loop goes in. The XF used to have grey carpet but i got black plush and man, it looks like a new car (in the carpet department at least).
One tip for you, mark the hole and drill outside the car. If you try and drill while in the car, thinking you can get the bit perfectly through the hole(especially seatbelt holes), you WILL nick it and cock the thread up and you'll be real happy then
-
Im using hpr30(20w60), although mine isnt new. Look into HRP10 (10W50). They have a gas version of both 30 and 10, but im not sure if they're any better than the originals. If anyone can elaborate on that, i'd like to know too
-
I used transtar rubberised undercoating on the bottom of my car, leaves a rough finish and is similar to Cguard i believe
https://www.tat-co.com/products/specialty-coatings/quick-dry-rubberized-undercoating-50-state-4363-f/ -
And make sure you replace worn bushes or put the bushes you intend to run with on first. They can make a huge difference to how the car handles

What colour speedo gear?
in Transmission and Differential
Posted
thats odd, was your speedo reading off? I swear i had a pink 19T one with my 2.92